Agency settings
Pro
Set your agency name, portal colours, the price markup and where clients sign in.
Agency → Agency settings controls how clients see you.
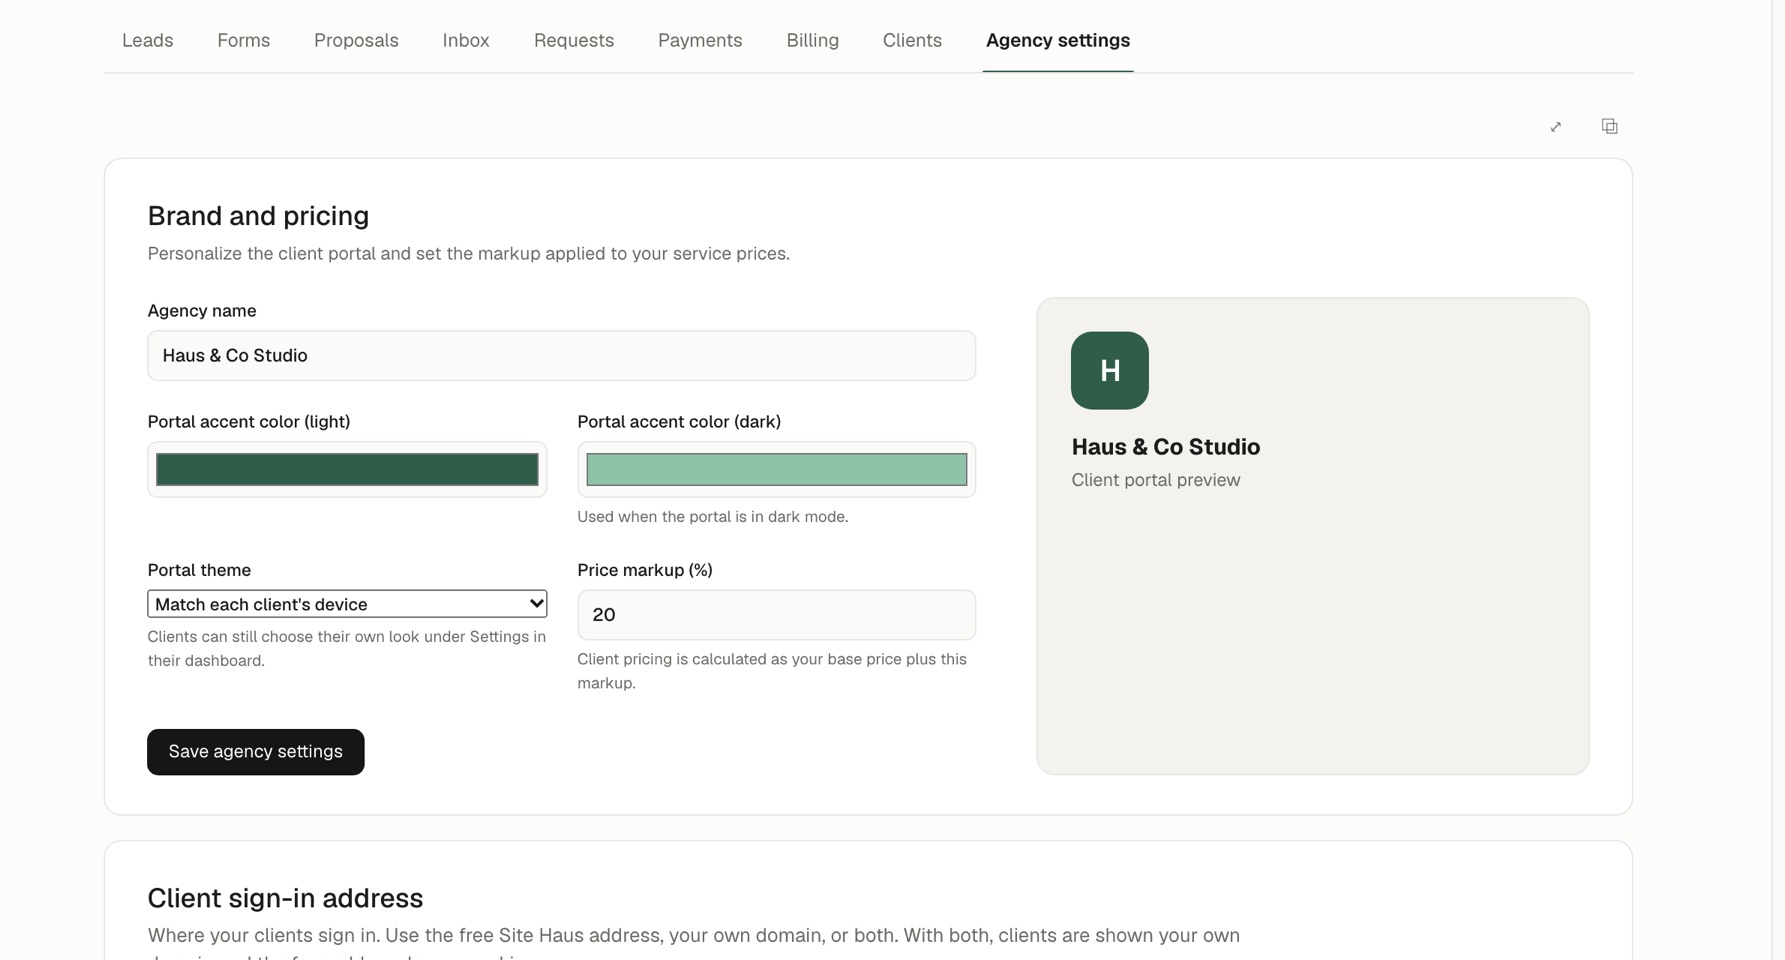
Brand and pricing#
- Agency name, shown on forms, proposals and the client portal.
- Portal accent color (light) and (dark). The dark one is used when the portal is in dark mode.
- Portal theme: for example Match each client's device. Clients can still choose their own look under Settings in their dashboard.
- Price markup (%): your client pricing is your base price plus this markup. It shows as Agency markup on each client and as Client quote on leads.
A preview card shows how the portal header will look. Press Save agency settings to apply.
Agency settings is made of folding sections, like Admin → Integrations: Brand identity, Brand and pricing and Client sign-in address. They all start closed. Press + to open one, drag the handle to change the order, and your choices are remembered in your browser.
Brand identity#
At the top of Agency settings is your brand identity, drawn as one page with numbered sections: 01 The mark, 02 The wordmark, 03 The lockup, 04 The icon at five sizes, 05 The palette and 06 The type. It follows your light or dark theme.
The quickest start is to upload your logo. Drop it on the box at the top of the identity section, or click it to choose a file. Site Haus then reads the picture and fills in what it can:
- Colours. The main colours of the logo are added to your palette, named Primary, Secondary and so on, and marked From logo. A white background is ignored.
- Fonts. If the logo is an SVG that names its fonts, and they are in our list, they are chosen for your headings and text. If it uses a font we do not have, it tells you so you can pick a close one.
- What is left. A line under the box tells you what it could not read and what is still for you to add, such as the app icon, a tagline or a text font. A photo or PNG has no font names to read, so those are always left to you.
If you like the main colour, press Use the main colour as my portal accent.
You edit the page itself:
- Click the logo or the icon to upload a new one, or drop a file on it.
- Click a colour to pick another. Click its name or role to rename it, hover to remove it, and use Add a colour for more.
- Click a note or the tagline and type. Each section has a line for a note.
- In the type section, click a font name to choose another font for headings, text or labels, and click a sample line to type your own words.
Changes save by themselves a moment after you stop, and Save identity below the page saves right away. Edit identity under the page holds buttons to choose or remove the pictures.
- Pictures. Upload a logo mark and, if you like, a square app icon (PNG, JPEG, WebP, GIF or SVG, under 512 KB). The icon falls back to the mark.
- Tagline. A short line that shows under the wordmark and at the bottom.
- Fonts. Choose a font for headings, for text and for labels and numbers.
- Palette. Up to nine colours, each with a name and a role. Until you add your own, it shows paper, ink and your two portal accent colours from the settings below.
- Notes. A short line under each section, such as why the mark looks the way it does.
Press Save identity to keep it. Pictures save as soon as you choose them.
Your identity is used in these places:
- The client portal shows your logo mark in the header and uses your fonts.
- New proposals start with your accent colour and your fonts.
- In Inbox → Email design → Style, press Use my brand identity to fill in your logo, accent, text colour and font.
Each client has an identity of their own. Open a client in Clients and find Brand identity under their projects. It works the same way, and keeps the client's logo, fonts and colours in one place for every project you build for them.
Client sign-in address#
Below, Client sign-in address is where your clients sign in. Use the free Site Haus address, your own domain, or both. With both, clients are shown your own domain and the free address keeps working. Follow the steps shown there, including the DNS record for your own domain, or read Connect your own domain for the full walk-through.
Email and requests#
The Email and requests card decides whether email from your clients opens a request by itself, and which emails to skip. It is off until you turn it on.
- When an email arrives from a client. Leave it in the inbox (the default), or open a request for it automatically.
- Never open a request for these senders and Skip when the subject contains. Lists, one entry per line.
- Skip no-reply, notification and newsletter senders. On by default.
- Try it. Type a sender address (and a subject if you like) to see whether it would become a request.
Changes apply to new email only. The full story, including what happens to the conversation and how later emails join the request, is in Tickets and inbox.
Email design#
On the Pro and Power plans, the emails you send to clients and leads can look like your agency instead of plain text. Open Inbox in the Agency menu and choose the Email design tab. The tab only shows once your plan includes it.
An email is built from templates, and a template is a stack of blocks.
- Design. Click a block in the email, or in the Layers list, to change it. Add blocks from Add a block: header, heading, text, image, button, two columns, divider, space, signature and footer. Drag layers, or blocks in the email itself, to reorder them. Drag a block from Add a block into the email or the list to add it exactly where you drop it. The arrows also work. Every block has Spacing (padding on each side, from 0 to 80) and an optional Background colour with rounded corners. The message block is where each email's own words go, so every template has one.
- Formatting and links in text. In a Text block, a column or the Wording message, use the B, I and Link buttons above the box. Select some words and press Link to link them to an address. You can also type the marks yourself:
**bold**,*italic*and[words](https://example.com). Addresses typed on their own become links. Mail apps that show plain text get the words with the address in brackets. - Links in the signature and footer. The signature's More lines box and the footer text have the same B, I and Link buttons, so you can link your website, booking page or terms. The address and the other signature lines accept the same marks typed by hand.
- How links look. In Style, under Links in text, choose whether links are underlined, bold or italic, and whether they use their own colour or the text colour. It applies to links in text, columns, the signature and the footer. Buttons keep their own style.
- Templates. Use New to start from a ready-made template (Simple, Announcement, Welcome, Follow-up, Newsletter or Blank), or Duplicate one of yours. You can keep up to 20.
- Draft with AI. Choose New, then Draft with AI, describe the email in a sentence or two, and you get a first version to change. It uses your AI allowance like any other draft. The AI leaves pictures empty for you to add.
- Style. The logo (the https address of an image), the colours of the button, background, email and text, a font and how rounded the corners are. Add a signature (name, title, phone and anything else) and a footer with text, an address and up to four links. Style applies to every template.
- Wording. Pick one of the standard emails (the form link, a price revision, a new message in the client portal) and write your own subject and message. Words like {{first}}, {{brand}} and {{link}} are filled in when it is sent. A link on a line of its own becomes a button.
- Where it is used. Choose which template each kind of email uses. Anything you leave on the default uses the template for replies and other messages.
Turn on Use for emails to clients and leads and press Save. Messages you write yourself, such as replies and messages to a lead, keep your words and gain the template and the signature. Mail apps that cannot show designs get clean text with the same words.
On Free and Pro you see an example and an Upgrade to Power button. See Plans and credits.